Tutorials
・
.
.
AI routing that validates design rules as it works — no separate DRC pass needed
Ever finished routing only to get hit with a wall of DRC errors? MODI Factory's AI automatically validates design rules as it routes — so the board comes out clean the first time.
You've finished routing. You run a Design Rule Check (DRC). The error list loads — and it's long.
Clearance violations, missed connections, traces too narrow for the required current — working through an error list one by one, you can easily lose sight of your original design intent. Experienced engineers budget significant time for complex routing; for those still learning the workflow, that time is often considerably longer.
MODI Factory's Routing feature is built for exactly this point in the process. Upload a placed PCB layout file, and the AI applies and validates design rules automatically as it routes — delivering a production-ready result without a separate DRC pass.
In this guide, we'll walk you through the full Routing workflow from file upload to final download, step by step.
📍 Placement vs. Routing: what's the difference?
This is the question that trips up most first-time MODI Factory users. Here's a quick breakdown before we get started.
Placement is the process of deciding where each component sits on the PCB — factoring in signal flow, thermal distribution, and manufacturability to find the optimal positions.
Routing is the process of electrically connecting those placed components by drawing copper traces based on the net connections defined in your schematic.
Placement always comes first; routing follows. Because MODI Factory offers both as independent modules, you can let the AI handle placement while routing manually, or — as in this tutorial — automate routing only. If you've already completed Placement in MODI Factory, you can feed that output file directly into this step.
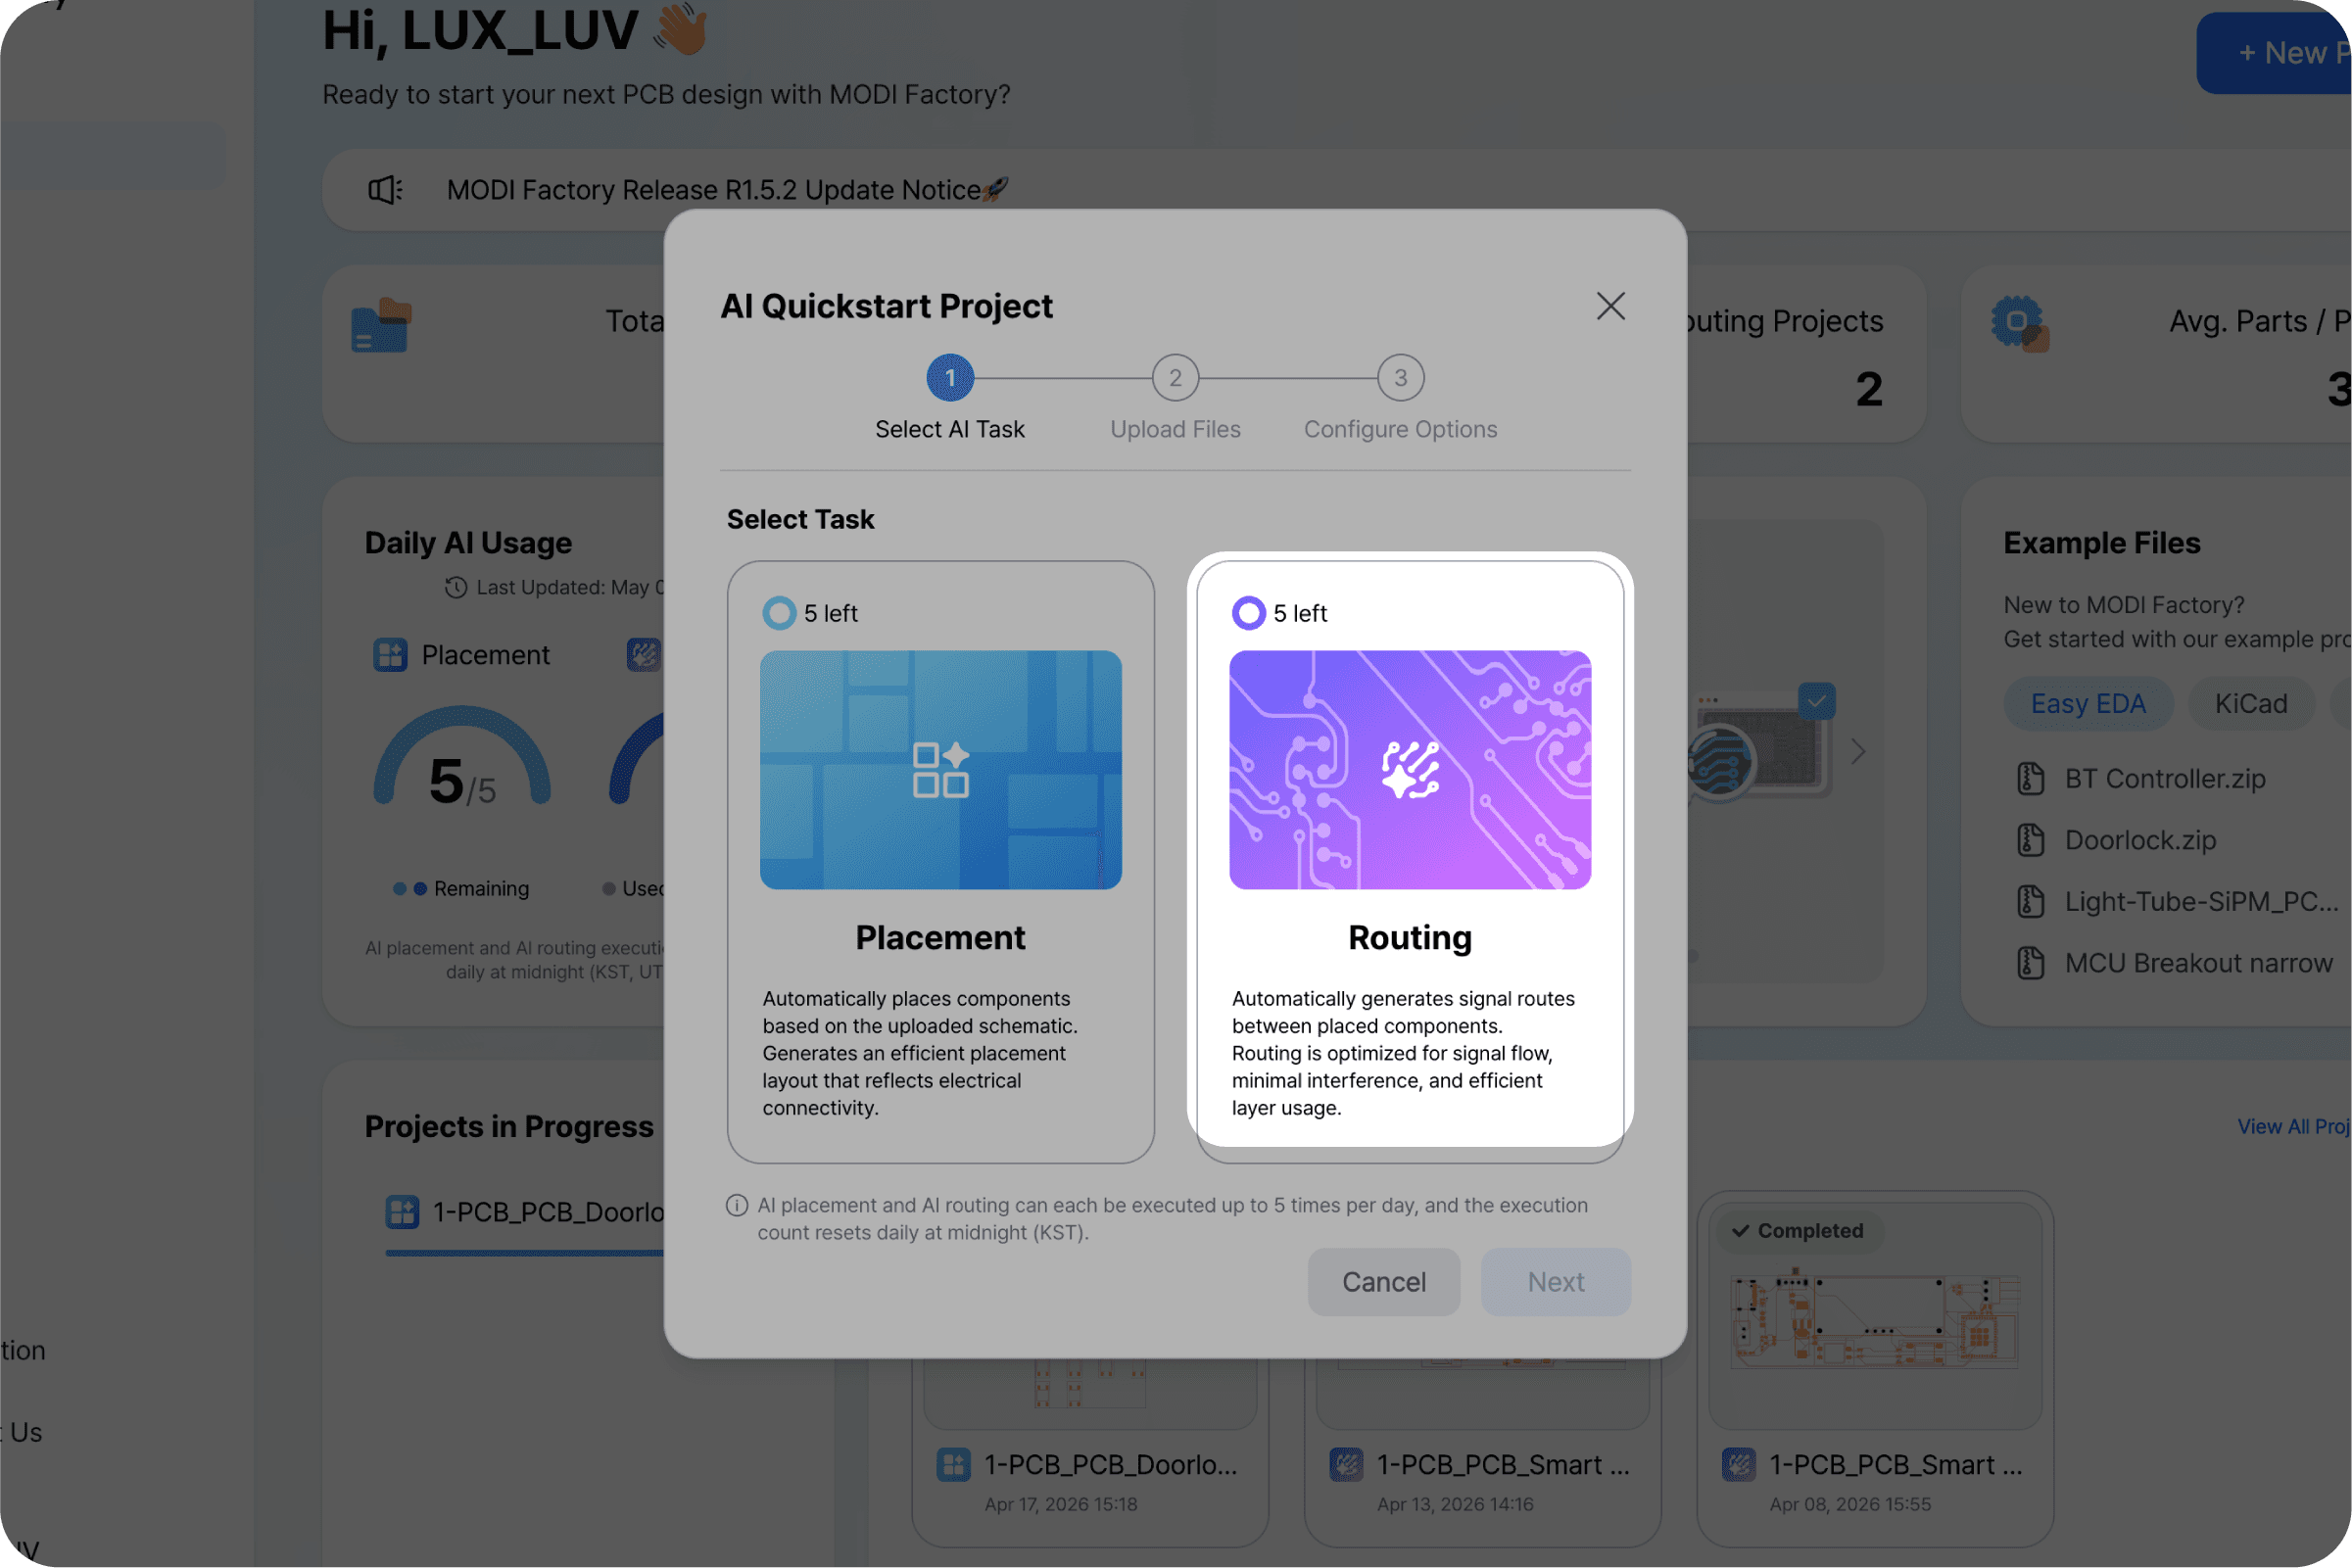
Step 1. Select the Routing feature
From your workspace, click [New Project]. On the feature selection screen, choose Routing this time.
Step 2. Upload your PCB layout file
The Routing feature requires a PCB layout file with placement already complete. You can use the output from MODI Factory's Placement step directly, or upload a file where you've completed placement manually in KiCad or EasyEDA.
⚠️ Important
The Routing engine works from a completed placement as its starting point. Uploading an unplaced layout file — one where components haven't been positioned yet — will produce unexpected results. Confirm that component placement is complete before uploading.
Step 3. Run AI routing
Once your file is uploaded, click [Next]. The AI applies design rules automatically and completes the routing. The entire process finishes within approximately 60 minutes — keep the browser tab open, or close it and come back later. The job continues running on the server either way.
Routing takes longer than Placement because optimizing net connection paths is a significantly more complex calculation. Expect processing time to increase with component count and layer complexity.
💡 What is a design rule?
Every PCB fabricator publishes a set of manufacturing constraints — minimum trace width, component clearance, layer-to-layer spacing, and more. Push past those limits and the board comes back with defects. MODI Factory's AI validates these constraints in real time throughout the routing process, which is why there's no separate DRC pass waiting for you at the end.
Step 4. Review results and read AI design comments
When routing is complete, you'll be taken to the results screen. Visually inspect the finished PCB layout — check that trace connections are correct and that the overall layout reflects your design intent.
*AI design rationale comments for routing will be available in a future update.
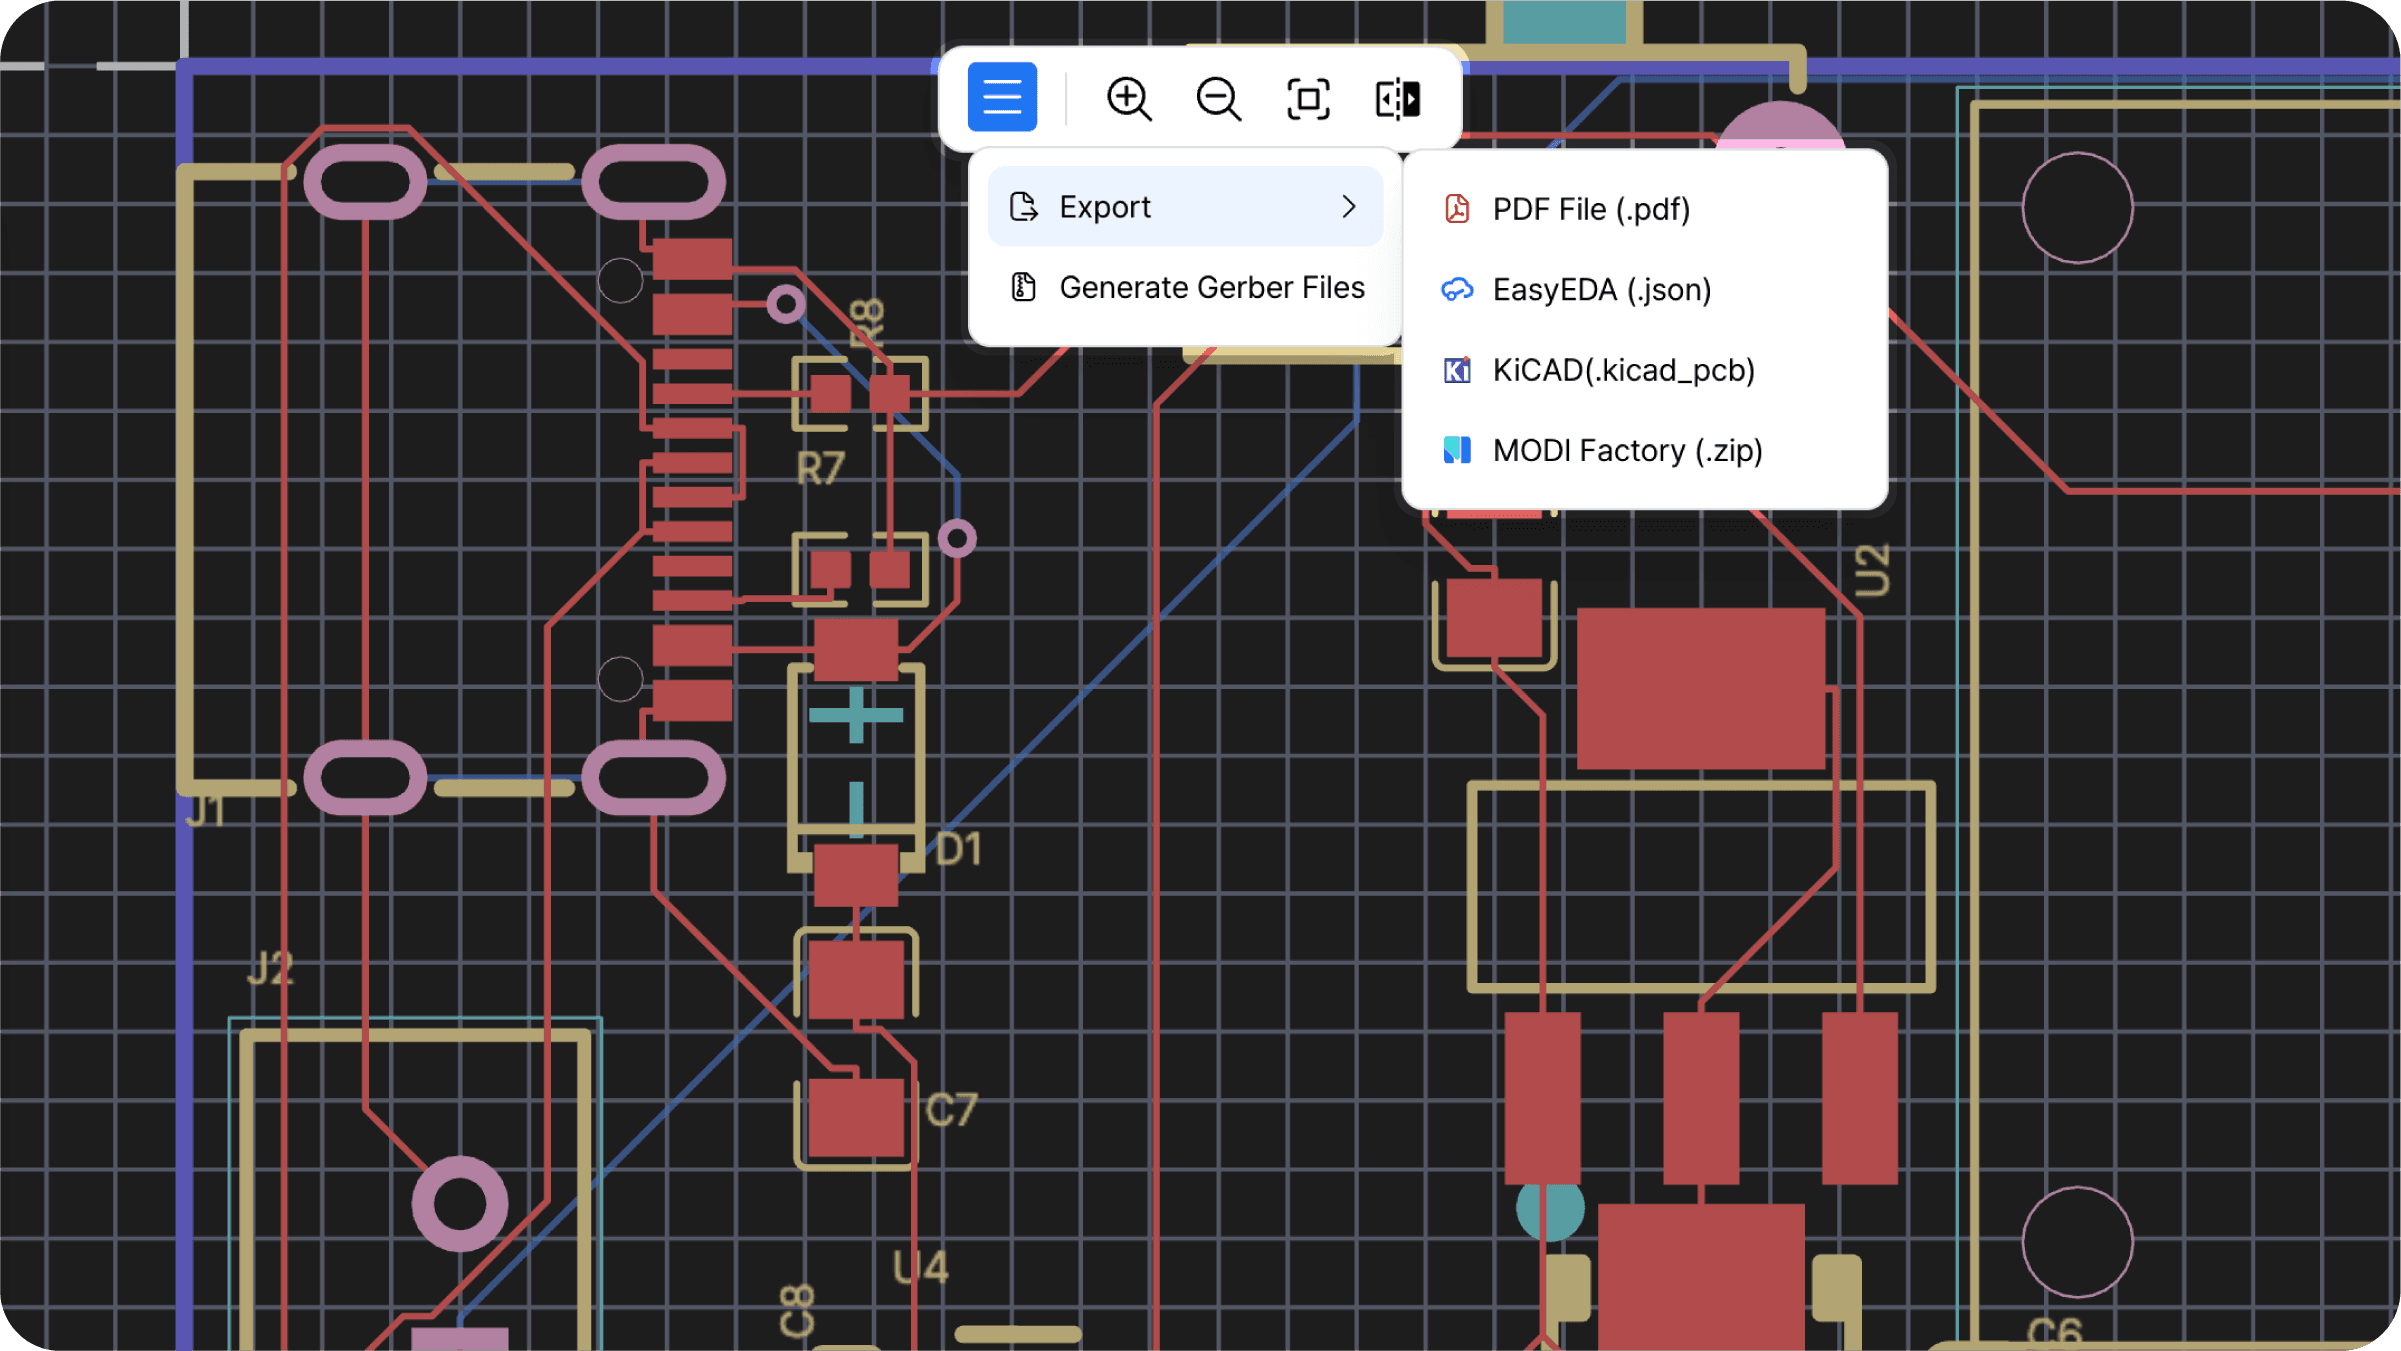
Step 5. Select an export format and download
Once you're satisfied with the results, click [Export] in the top menu and choose the format that fits your next step.