
Tutorials
・
.
.
MODI Factory new feature guide: placement note
MODI Factory tutorial ⑥: our legacy "placement comments" have been revamped into "placement note," providing precise design rationale down to the individual component level.
If you are an engineering student or junior engineer getting started with PCB design, running an auto-placement tool naturally brings up a few questions:
"Why is this decoupling capacitor placed this far from the IC?"
"Is this layout truly safe for signal noise and power stability?"
While MODI Factory’s previous placement comments provided a high-level overview of the entire board, the new placement note deliver clear physical and electrical justifications—along with actionable inspection points—the moment you click any component.
Here is a look at what MODI Factory AI placement note offer and how to use them.
1. Get started in 3 minutes: auto-placement and checking placement note
Step 1. Create a project and select auto-placement
Sign in to MODI Factory and click [+ New project] in the top-right corner.
Select the [Auto-placement] card to proceed.
![Select the [Auto-placement] card to proceed.](https://framerusercontent.com/images/adw9Zw7p60KhfFqbQ1DZShDXo.png)
Step 2. Upload schematic and layout files
Upload your current schematic and layout files.
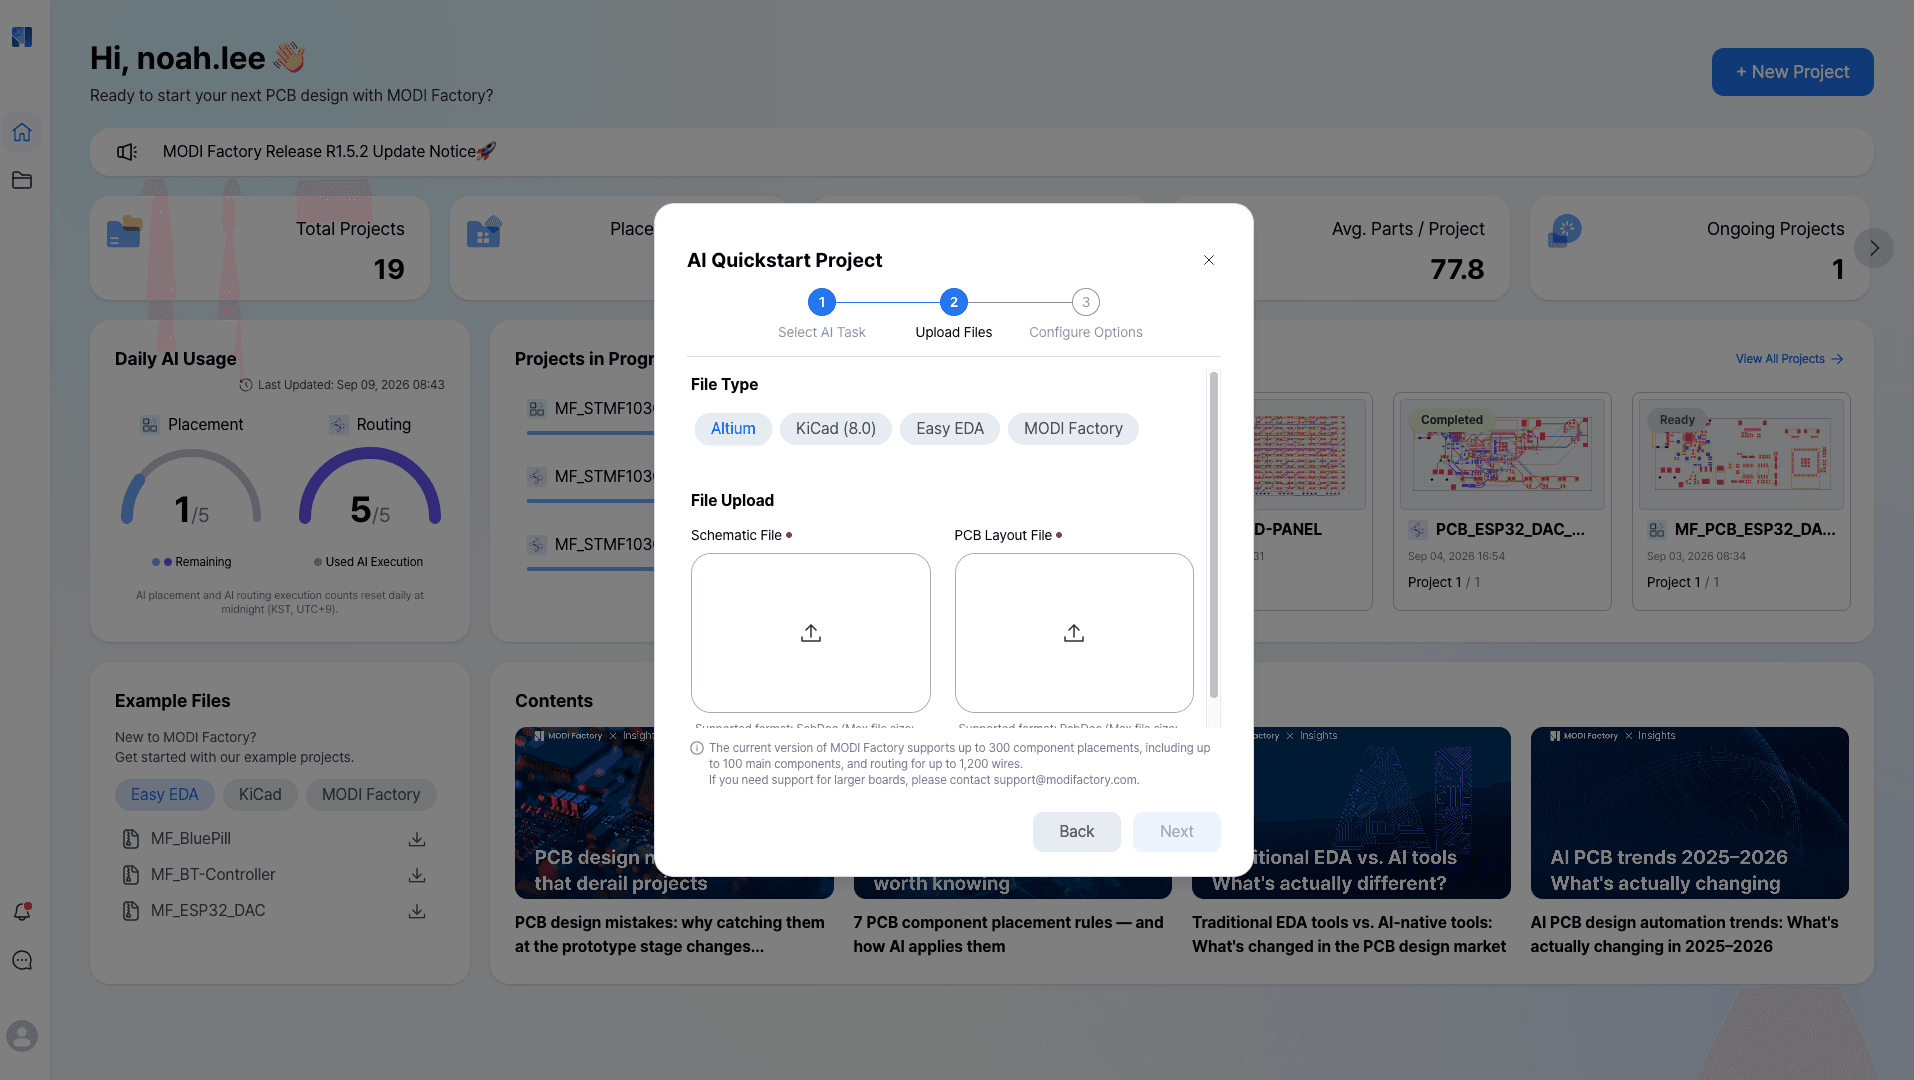
Configure your settings and run the placement; MODI Factory will generate the layout automatically. Before running placement, you can lock parts that require fixed positioning, or rotate and flip components as needed.

Step 3. Click a component to view its placement note immediately
Once placement is complete, click any component on the canvas that you want to inspect.
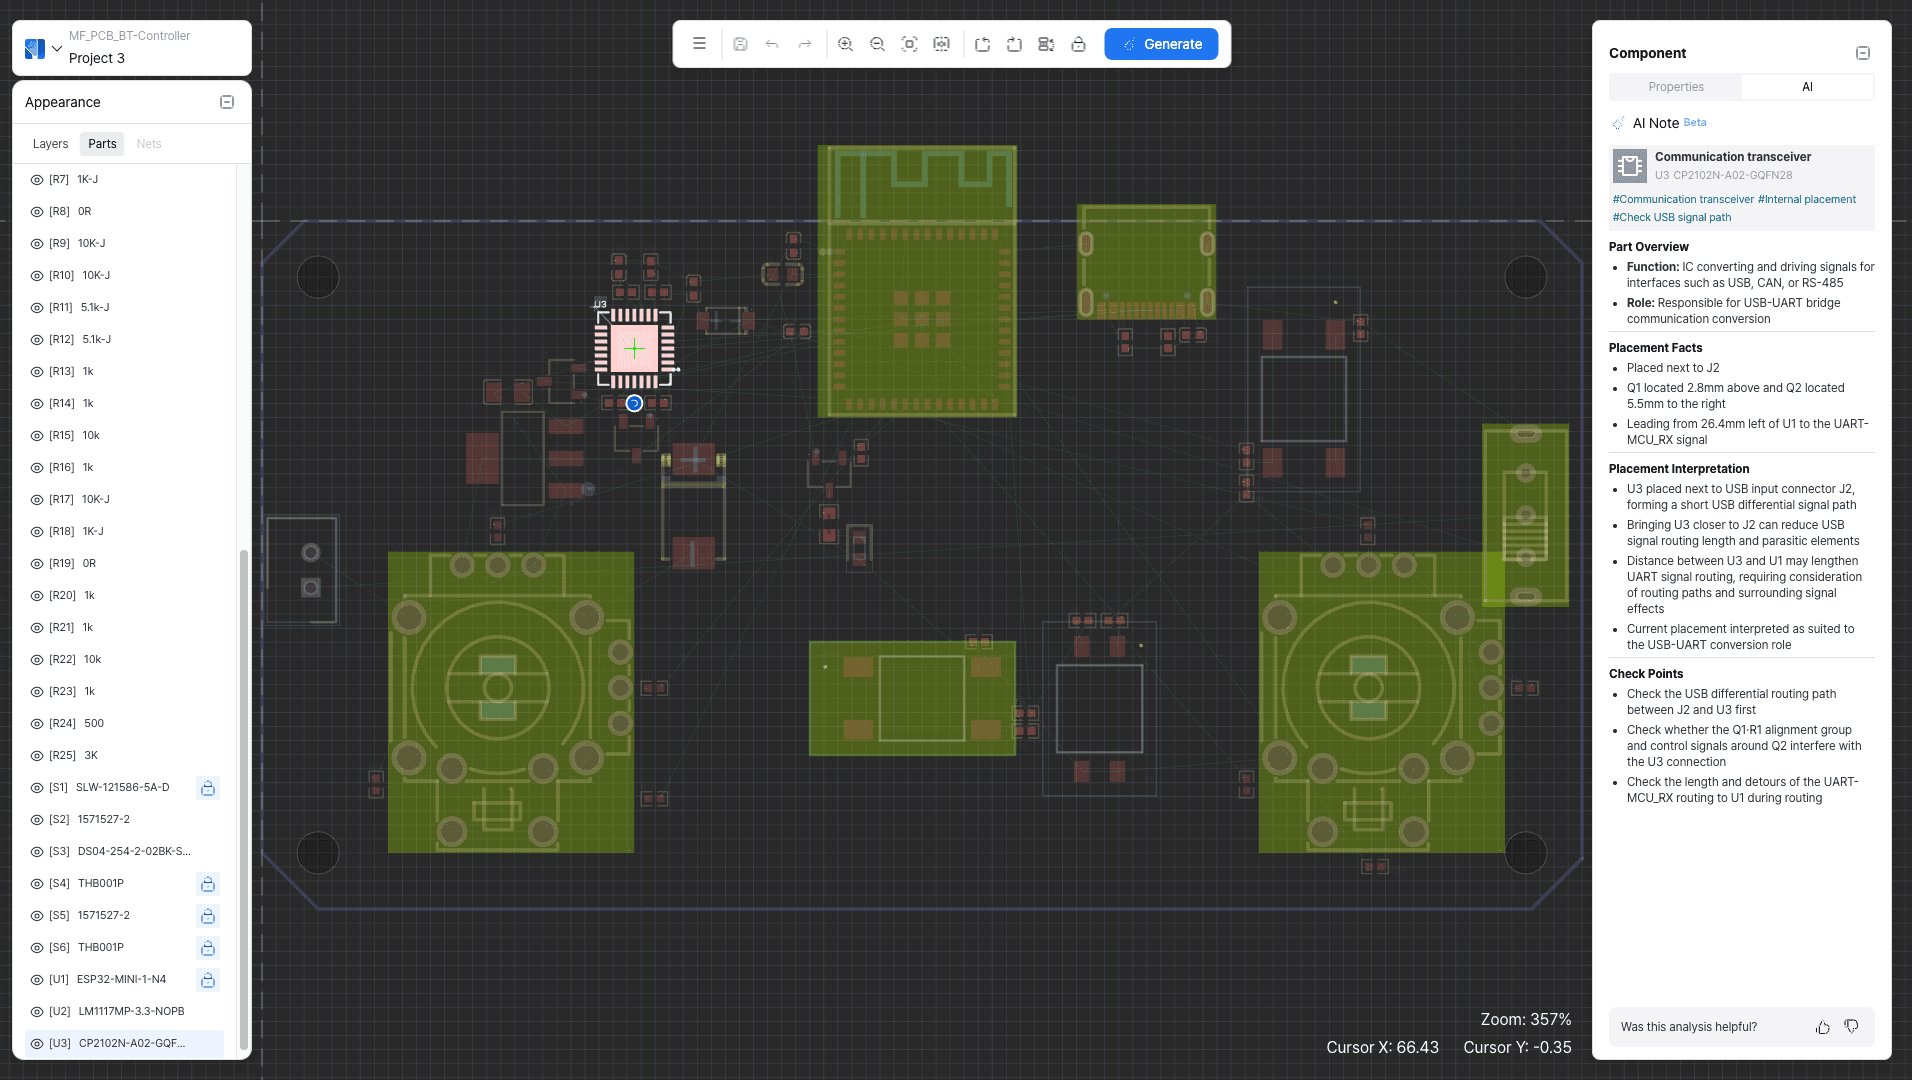
In the right-hand panel under the [AI] tab, a tailored AI placement note generated specifically for that part will open.
2. Understanding the placement note structure at a glance
Placement note are not just blocks of text. They are structured around the key areas engineers must verify during design reviews.
Detailed report fields
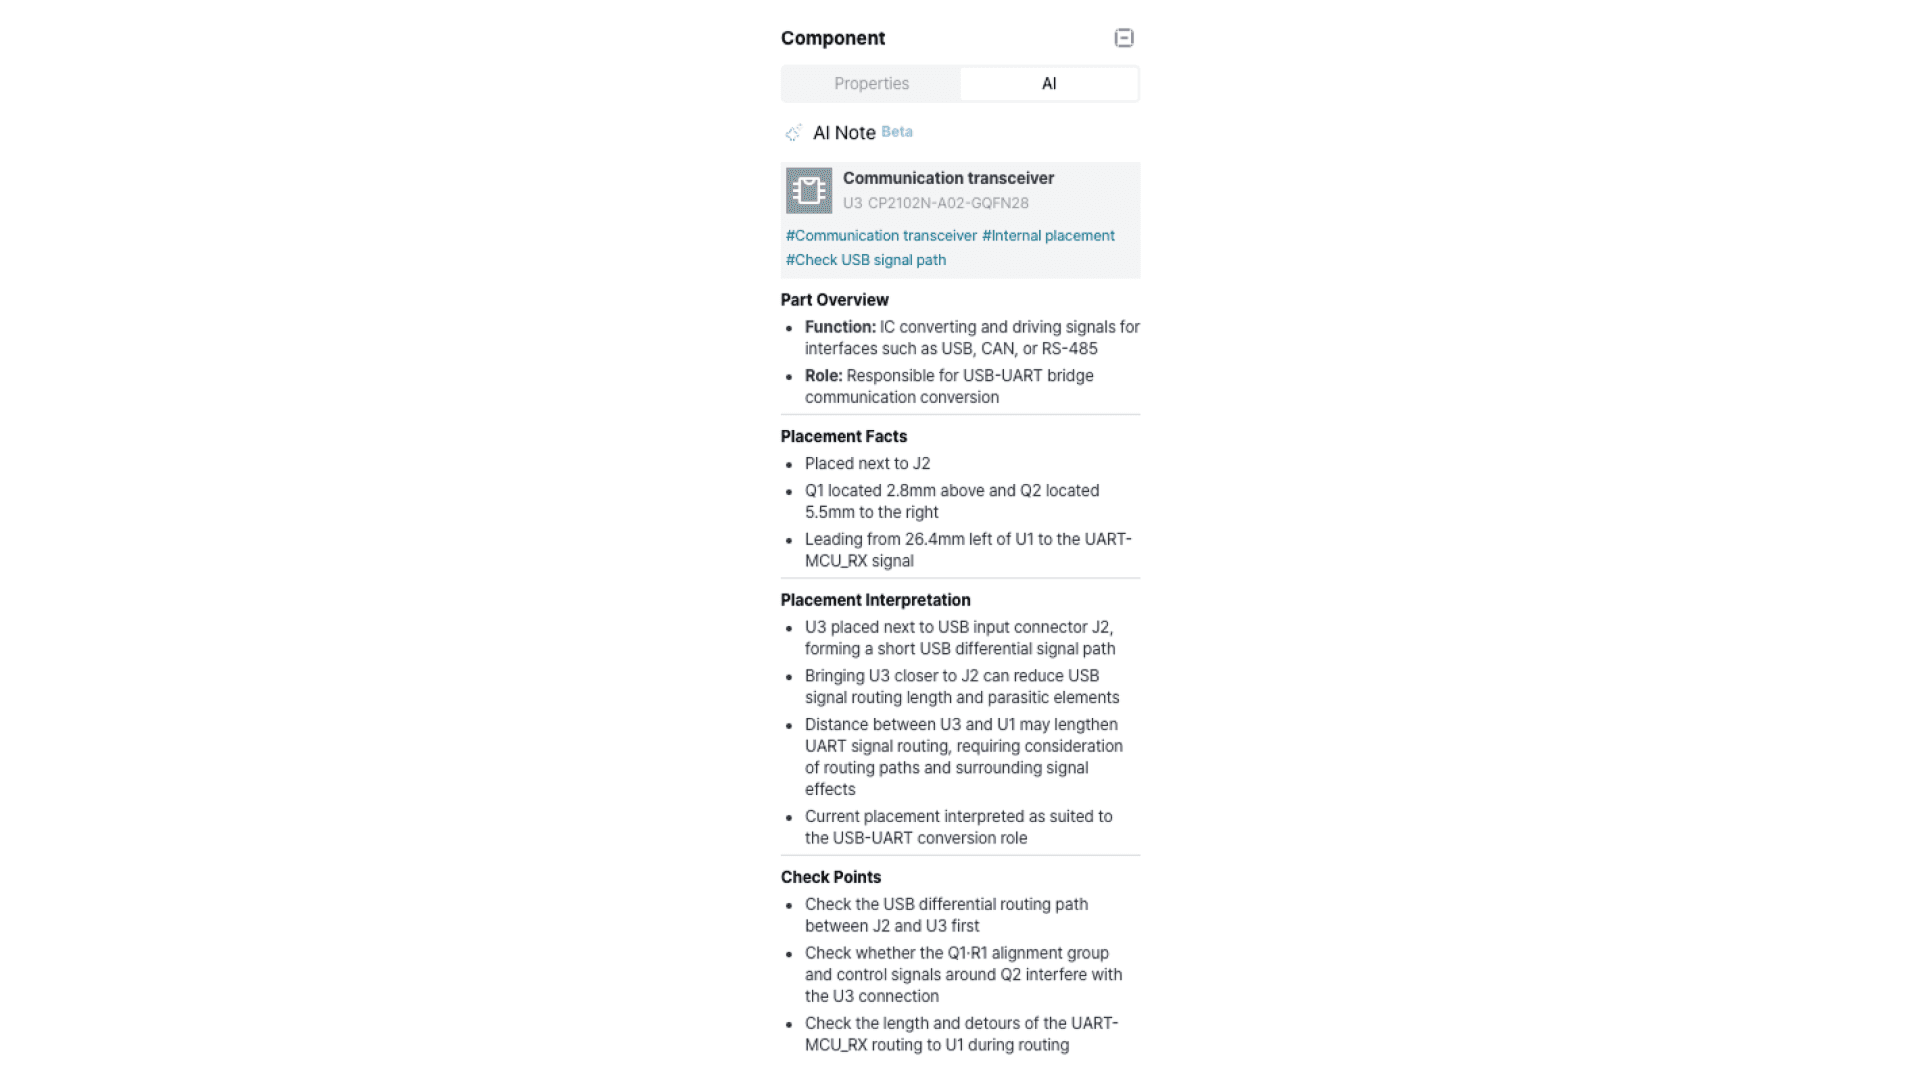
Part information & summary keywords: Key tags like #Core_IC or #LDO_regulator help you make fast, informed decisions.
Part Overview: Defines the component's general role in the circuit alongside its specific function in your board design.
Example: "An MLCC capacitor that prevents voltage drop when the IC draws sudden surge currents."
Placement Facts: Delivers quantitative measurements (hard facts) rather than guesswork.
Example: "Measured pair: U1 VDD pin; distance is 2.1 mm, meeting the upper design threshold (< 3.0 mm)."
Placement Interpretation: Explains the electrical implications and trade-offs of the current position regarding signal integrity (SI), thermals, and noise.
Example: "Placed near the U1 analog power pin to minimize trace inductance and support local power stability."
Check Points: Provides a clear checklist of items to verify before moving on to routing.
Example: "Verify minimal loop area and ensure a solid GND return path during subsequent routing."
Tip: Can I rely on MODI Factory's AI placement note?

